Z-Image LoRA Training Complete Guide: From Dataset Preparation to High-Quality Output
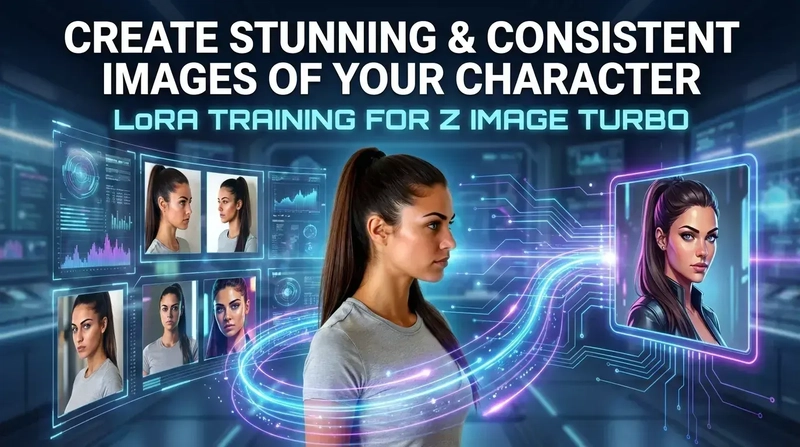
Abstract: LoRA (Low-Rank Adaptation) is one of the most efficient ways to fine-tune diffusion models. This article systematically explains the complete LoRA training workflow on the Z-Image platform: from dataset preparation, parameter configuration, optimizer selection, to training monitoring, quality evaluation, and troubleshooting, helping creators build their own character, style, and brand visual assets.
Table of Contents
- What is LoRA? Why Does Z-Image Need It
- Dataset Preparation: Selection, Cropping, and Captioning
- Deep Dive into Core Training Parameters
- Optimizer Selection Guide
- Training Workflow: Step by Step
- Quality Monitoring and Effect Testing
- Common Troubleshooting
1. What is LoRA? Why Does Z-Image Need It
1.1 How LoRA Works
LoRA (Low-Rank Adaptation) is a parameter-efficient fine-tuning technique. Its core idea is simple: instead of modifying all weights of the original model during training, it inserts small adapter layers into the attention layers of the model, training only these newly added few parameters.
Original model weights (frozen) → Decomposed into low-rank matrices A × B → Only train A and B
After training is complete, LoRA weights can be overlaid onto the base model with extremely small file sizes (typically 10~200 MB), achieving results equivalent to full-parameter fine-tuning, while reducing VRAM requirements by several times.
1.2 Typical Use Cases
| Scenario | Description |
|---|---|
| Character-consistent Portraits | Train a LoRA for a specific character (virtual character, real person), maintaining facial consistency across any prompt |
| Brand Visual Assets | Customize brand-specific color palettes, logo styles, product rendering styles for batch marketing material generation |
| Unique Artistic Styles | Learn a particular art style (watercolor, oil painting, cyberpunk, etc.), instantly convert any scene into that style |
| Product Visualization | After training a product LoRA, quickly generate product display images from different scenes and angles, replacing photoshoots |
1.3 LoRA Advantages on Z-Image
Z-Image natively supports LoRA loading and training. Combined with its powerful Chinese language understanding and high-quality image generation base, creators can:
- Complete training at a lower hardware threshold (consumer-grade GPU is sufficient to start)
- Obtain usable results within a shorter iteration cycle
- Flexibly switch between Base version fine-tuning and Turbo version quick preview
2. Dataset Preparation: Selection, Cropping, and Captioning
High-quality datasets are the decisive factor in LoRA training success. Let's break this down into three steps.
2.1 Image Quantity and Quality
| Requirement | Recommended Value |
|---|---|
| Number of Images | 20~30 (fewer than 15 leads to underfitting, more than 50 shows diminishing returns and may introduce noise) |
| Resolution | Uniformly crop to the same resolution, recommend 1024×1024 or 768×768 |
| Quality | Only select HD, non-blurry, watermark-free original images |
| Diversity | Cover different angles, poses, lighting, expressions, backgrounds |
Key Principle: Quality > Quantity. 10 carefully selected HD images are better than 50 inconsistent ones.
2.2 Image Preprocessing
- Crop to uniform ratio: Use automatic cropping tools or manual cropping to ensure all images maintain the same aspect ratio.
- Unify resolution: It is recommended to scale images to 1024×1024 (Z-Image native resolution) to avoid size fluctuations during training.
- Remove irrelevant elements: If the goal is a character portrait, crop out excessive background elements, letting the subject occupy more than 60% of the frame.
# Batch resize example using Pillow
from PIL import Image
import os

target_size = (1024, 1024)
input_dir = "./raw_images"
output_dir = "./processed_images"

os.makedirs(output_dir, exist_ok=True)

for fname in os.listdir(input_dir):
    img = Image.open(os.path.join(input_dir, fname))
    img = img.resize(target_size, Image.LANCZOS)
    img.save(os.path.join(output_dir, fname))
2.3 Image Captioning
Each training image needs a corresponding text caption that tells the model "what is in this image." There are two captioning styles:
Concise Captioning
Contains only core subject features, suitable for style LoRAs:
1girl, red hair
Detailed Captioning
Contains richer detail descriptions, suitable for character LoRAs:
1girl, long red hair, bright blue eyes, gentle smile, standing, indoor, soft lighting
Captioning Principles:
- Character LoRA: Do not include the character's identity marker (e.g., name) in the caption, letting the model learn "this is the character." Captions should only describe the visual content.
- Style LoRA: Captions should highlight style features, such as
watercolor style, soft edges, pastel colors.- All image captions should maintain a consistent format.
2.4 Regularization Images
Regularization images are used to prevent overfitting. They are general-purpose images related to the training subject, helping the model remember "normal" background knowledge.
| Scenario | Regularization Image Recommendation |
|---|---|
| Character Portrait | Random person photos (not the training target), labeled with generic descriptions |
| Artistic Style | Original scene photos (not style-transferred) |
| Product Visualization | Generic images of similar products |
The number of regularization images is typically 1~2 times the number of training images. If no regularization images are available, appropriately reduce the learning rate and increase early stopping.
3. Deep Dive into Core Training Parameters
The table below summarizes core LoRA training parameters and their recommended configurations:
| Parameter | Recommended Value | Description |
|---|---|---|
| Learning Rate | 1e-4 |
Starting value; style LoRA can try 5e-5, character LoRA can try 2e-4 |
| Epochs | 10~15 |
Too few causes underfitting, too many cause overfitting; start from 10 and gradually increase |
| Network Rank | 32 |
Controls LoRA capacity; characters recommend 32~64, styles recommend 16~32 |
| Network Alpha (α) | 16 (half of rank) |
Scaling factor; generally set to half of rank |
| Batch Size | 1~4 |
Limited by VRAM; gradient accumulation can effectively increase batch |
| Checkpoint Interval | Every 2~3 epochs | Keep intermediate models for easy rollback to the best epoch |
| LR Scheduler | constant → cosine |
Use constant for stable early training, cosine for fine convergence later |
| Noise Offset | 0.02~0.05 |
Fine-tune denoising, improve detail quality |
| Gradient Accumulation Steps | 2~4 |
Method to effectively increase batch size when VRAM is insufficient |
3.1 Learning Rate (Learning Rate) Detail
The learning rate determines the magnitude of each update step, making it the most important single hyperparameter.
- Too small (< 1e-5): The model learns almost nothing, training is ineffective (underfitting).
- Moderate (1e-4): Balances speed and quality, recommended as default starting point.
- Too large (> 5e-4): Training is unstable, loss oscillates, may cause model collapse.
3.2 Network Rank Detail
Rank determines LoRA's "memory capacity":
| Rank | Suitable Scenario | File Size |
|---|---|---|
| 8~16 | Simple styles, light features | 5~15 MB |
| 16~32 | General recommendation, balanced quality and size | 15~40 MB |
| 32~64 | Complex characters, fine features | 40~80 MB |
| 64+ | Special needs, requires large data support | 80+ MB |
Rule of thumb: The smaller the dataset, the lower the rank should be, otherwise overfitting is likely. For 20 images, rank ≤ 32 is recommended.
3.3 Learning Rate Scheduler
| Scheduler | Characteristics | Recommended Timing |
|---|---|---|
constant |
Fixed learning rate throughout | Early training, fast convergence |
cosine |
Learning rate decays along cosine curve | Late training, fine adjustment |
constant_with_warmup |
Linear warmup then constant | When training is unstable |
Recommended strategy: Use constant for the first 5 epochs, switch to cosine for the remaining 5~10 epochs.
4. Optimizer Selection Guide
The optimizer determines the parameter update strategy, directly affecting training speed and final quality. Here is a comparison of the three most commonly used optimizers in Z-Image training:
| Optimizer | Speed | Quality | VRAM Usage | Recommended Scenario |
|---|---|---|---|---|
| AdamW8bit | ⚡ Fast | 🟡 Good | 🟢 Low | Default recommendation, balanced speed and quality |
| AdamW (FP32) | 🐢 Slower | 🟢 Best | 🔴 High | When pursuing maximum quality with sufficient VRAM (24GB+) |
| Lion | ⚡ Fast | 🟡 Experimental | 🟢 Very Low | Exploratory training, alternative for low VRAM environments (8~12GB) |
4.1 AdamW8bit — Recommended Default
- Advantages: 8-bit quantization significantly reduces VRAM usage, training speed is 30%~50% faster, with minimal quality loss.
- Suitable for: Most training scenarios, especially users with 16~24 GB VRAM.
- Learning rate recommendation:
1e-4
4.2 AdamW (Full Precision) — Quality First
- Advantages: Full-precision gradient updates, theoretically optimal, finest detail performance.
- Disadvantages: High VRAM requirements, slower training speed.
- Suitable for: Commercial-grade projects, devices with 24 GB+ VRAM.
- Learning rate recommendation:
5e-5 ~ 8e-5(slightly lower than the 8-bit version)
4.3 Lion — Lightweight Experimentation
- Advantages: Extremely low VRAM usage, suitable for entry-level GPUs with 8~12 GB VRAM.
- Disadvantages: Quality stability is inferior to AdamW series, results may fluctuate.
- Suitable for: Quick prototype validation, VRAM-constrained exploratory training.
- Learning rate recommendation:
1e-4
5. Training Workflow: Step by Step
Step 1: Prepare the Dataset
dataset/
├── images/              # Training images
│   ├── img_001.png
│   ├── img_001.txt      # Corresponding caption
│   ├── img_002.png
│   ├── img_002.txt
│   └── ...
└── regularization/      # Regularization images (optional)
    ├── reg_001.png
    └── ...
Step 2: Configure Training Parameters
# Example configuration file (config.yaml)
model: "zimage-base"
dataset_dir: "./dataset"
output_dir: "./output"

# Core parameters
learning_rate: 1e-4
num_epochs: 12
network_dim: 32        # rank
network_alpha: 16
batch_size: 2

# Optimizer
optimizer: "AdamW8bit"
lr_scheduler: "cosine"
lr_warmup_steps: 100

# Save strategy
save_every: 3           # Save checkpoint every 3 epochs
save_precision: "fp16"

# Regularization
regularization_images: "./dataset/regularization"
reg_weight: 0.1

# Trigger word
trigger_word: "zi_char"
Step 3: Start Training
# Start training using Z-Image training tool
zimage-train --config config.yaml
Step 4: Monitor Training Process
Closely monitor the following metrics during training:
- Loss curve: Should steadily decline;剧烈波动 (severe fluctuation) indicates the learning rate is too high.
- VRAM usage: Ensure no OOM (Out Of Memory).
- Checkpoint generation: A checkpoint is automatically generated every 2~3 epochs.
Step 5: Test Each Checkpoint
After each checkpoint is generated, immediately test output quality with the same prompt:
# Test prompt format
[trigger_word], [your prompt details]

# Specific example
zi_char, standing in a park, sunset, cinematic lighting
6. Quality Monitoring and Effect Testing
6.1 Monitoring Metrics During Training
| Metric | Normal State | Abnormal State |
|---|---|---|
| Loss Value | Gradually decreasing and stabilizing | Oscillating, spiking, or not decreasing |
| Test Images | Subject features becoming more stable | Artifacts, detail loss, or no change at all |
| Training Speed | Stable | Suddenly slows down (possible VRAM fragmentation) |
6.2 Quality Checklist
After training is complete, evaluate LoRA quality from the following dimensions:
- [ ] Subject Consistency: Does the character/style maintain core features across different scenes?
- [ ] Flexibility: Can it generate normally with different poses, backgrounds, clothing?
- [ ] No Artifacts: Are there strange texture repetitions, color blocks, or deformities in the output?
- [ ] Controllability: Are non-LoRA parts of the prompt (scene, lighting, etc.) still correctly understood?
- [ ] Generalization: Can scenes/poses not present in the training set be reasonably generated?
6.3 Test Matrix
It is recommended to use the following combinations for systematic testing:
| Test Item | Prompt Example |
|---|---|
| Full body front | zi_char, full body, standing, simple background |
| Side close-up | zi_char, side view, close-up, studio lighting |
| Different scene | zi_char, in a coffee shop, warm lighting |
| Different style mix | zi_char, watercolor style, soft background |
| Extreme conditions | zi_char, night, rain, neon lights |
Key judgment: If the LoRA can only generate near the training set, it has poor generalization. If it's completely uncontrollable, it's undertrained.
7. Common Troubleshooting
7.1 Overfitting
Symptoms:
- All outputs are highly similar, almost "identical"
- Cannot respond to scene changes in prompts
- Loss drops to extremely low levels but test results worsen
Causes and Solutions:
| Cause | Solution |
|---|---|
| Too many training epochs | Reduce epochs (e.g., from 15 to 8~10), choose an earlier checkpoint |
| Learning rate too high | Reduce learning rate to 5e-5 |
| Too few dataset images | Increase training images to 25~30 |
| Missing regularization | Introduce regularization images |
| Rank too large | Reduce rank to 16~24 |
7.2 Underfitting
Symptoms:
- LoRA has almost no effect, output is similar to without LoRA
- Character features are unstable, appearing and disappearing
Causes and Solutions:
| Cause | Solution |
|---|---|
| Too few training epochs | Increase epochs to 12~15 |
| Learning rate too low | Increase learning rate to 1e-4 ~ 2e-4 |
| Insufficient data | Increase training image count |
| Rank too small | Increase rank to 32~64 |
| Poor caption quality | Check if captions accurately describe image content |
7.3 Style Bleed
Symptoms:
- After training a specific character, the model also generates that character's features when generating other characters
- Style LoRA affects elements that should not be stylized
Causes and Solutions:
| Cause | Solution |
|---|---|
| Trigger word weight too high | Reduce LoRA weight (e.g., from 1.0 to 0.7~0.8) |
| Over-training | Choose an earlier checkpoint |
| Improper captioning | Ensure captions don't contain the trigger word itself |
| Mixed dataset | Check if the dataset contains images not belonging to the training target |
7.4 Other Common Issues
| Issue | Possible Cause | Quick Fix |
|---|---|---|
| VRAM overflow (OOM) | Batch size too large | Reduce batch size or enable gradient accumulation |
| Extremely slow training | Optimizer choice / hardware bottleneck | Switch to AdamW8bit or Lion |
| Artifacts in output | Inconsistent resolutions | Check if all training images are uniformly cropped |
| Model collapse | Learning rate too large | Reduce to 5e-5 and restart |
Summary
LoRA training is a three-in-one process of "data quality + parameter tuning + iterative testing." Mastering the following key points can significantly improve success rates:
- Data is king: 20~30 carefully prepared high-quality images beat 100 rough materials.
- Parameters with moderation:
lr=1e-4,epochs=10~15,rank=32are reliable starting points, fine-tune from there. - Choose the right optimizer: AdamW8bit is the universal default, full-precision AdamW for extremely high-quality scenarios.
- Test frequently: Don't wait until all training is complete to check results; test checkpoints every 2~3 epochs.
- Trigger word habit: Develop the habit of using
[trigger_word], [prompt]format to precisely control the LoRA activation scope.
Through systematic training workflows and continuous iteration, you can train professional-grade LoRA models on Z-Image, injecting powerful personalization capabilities into your creative workflow.
Note: The parameters described in this article are general recommendations. Please flexibly adjust based on specific hardware, datasets, and creative goals. It is recommended to start with conservative parameters and gradually experiment to find the optimal configuration.